


Showing posts with label Homekeeping. Show all posts

Wednesday, August 17, 2011

A new schedule

A couple weeks ago, I saw THIS post with the idea of a visual schedule. I immediately loved it! I've tried a schedule several times, but every time I failed. I've mostly followed the MOTH system, but I always seemed to "fall off" the schedule and never figured out how to successfully get back on. However, I have noticed that Peanut does much better with a schedule. She needs to know we are doing this, then that, then food (she's all about the food, lol). So I've been trying to come up with a way to do a schedule that works for both of us. I'm hoping this idea will be a perfect fit. It's still a schedule, but easy to change on the fly if necessary.

Now, this post will also show that I am not a very good blogger, lol. I failed to take pictures of each step, so only have pictures of the final project. I'll do my best to walk you through how I did it, though =)

First, I created a document in word with all the items we would need on our schedule. I added a clip art that "matched" the item to make it easier on my non-readers. I then printed them on regular paper, 5 per page. I cut them out and glued them on a slightly larger piece of scrapbook paper.
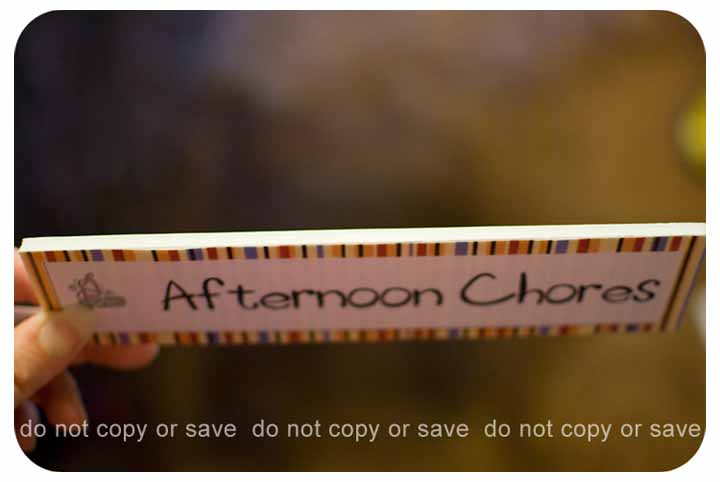
I then glued it on some foam board. Finally, I added a strip of magnetic tape on the back.

My Hubby then took the cabinet doors off our old BBQ and mounted them on the wall for me. Wala! Ultra cool visual schedule.

Close up of the top panel.

Close up of the bottom panel.

Wanna know what the best part is? I used materials I had on had, so it only cost me $3.99 for the magnetic tape! We haven't "officially" started using it yet (I only got it finished last night, lol), but I'm really excited to start. I really think it will help us stay in a routine.

Blessings,
Photobucket

Wednesday, April 27, 2011

New ebook!

31 Days To Clean by Sarah Mae

I've been looking at this book since she first released it! I absolutely LOVE the tagline "Having a Martha House the Mary Way". That is definitely what I want! Today only if you blog or tweet about the book, you get a free copy! How cool is that?!? I can't wait to get my copy and start getting my house and heart into shape! And I will keep everyone updated with how well it goes ;-)

Here is the link to her blog with more information: http://31daystoclean.com/

Blessings,
Photobucket

Friday, March 25, 2011

Recipe Organization

My recipe organization has always been lacking. A lot of the recipes I use (when I use a recipe, lol) I have printed off the internet or scribbled on a scrap of paper. Then they got shoved in a drawer, or cubbie, or pretty much wherever I could find when I was done with it! The biggest problem with that system was finding it again later. Here are some examples of my recipes:

This is a bunch of them laid out on the counter.

Here is a close up of one. You can't see it very well in the picture, but this one is actually splattered with Teriyaki sauce!
(This one got me a new kitchen floor, but that's another post, lol)


Here's another close up of a recipe. Can you tell what it's for? This would be one of the times I just scribbled the ingredients on a piece of paper rather than printing off the recipe.


I also have a few favorites in these cookbooks.


And this shelf has the rest of my cookbooks, which I only use occasionally.


So, back to the organization issue. The other night I looked everywhere for a recipe. It happened to be one that I had scribbled on a piece of paper and I didn't even know what site I had found it on so I could look for it again. It was imperative that I find the recipe, our dinner depended on it! I did finally find it (it was on top of the paper towel holder. Great place for it, I'm sure), but it took me close to 20 minutes.

Since I'm also the type of person who suddenly goes "Oh shoot! I should have started dinner 10 minutes ago!", spending 20 minutes looking for a recipe can be a real drag. So, I decided it was time to do something about it (finally!).

I went to Michaels and got these cute recipe cards for $1 a package.
Then I went through all the recipes I had stashed different places and wrote the ones I use frequently on the cards. I then filed them in this old picture album that I already had.

For a couple of bucks, my recipes are now organized! I do still have a stack of recipes I want to try and one of recipes I only make rarely (like desserts). But they are all together in the SAME drawer. I will, also, probably add recipes to my book as I go.

Another thing I discovered while working on this project; I don't actually USE a recipe very often! I didn't realize it because it always seemed like I was searching for a recipe. But I went through a bunch of old menus to see what recipes to gather, I kept passing meals by because I didn't need a recipe for them! I guess most of the things I cook, I know what goes into and I just wing it, lol.

This realization of my cooking does pose a new problem, however. I'm trying to be more diligent about having my kids in the kitchen with me when I cook, so that I can teach them how. But I don't have a recipe to hand them for the majority of the things I cook. So, I will be getting more recipe cards and as I cook something that I don't already have a recipe for, I will write it down on a card. Eventually I will have a collection of recipes that Munchkin can take with her when she marries. I will also be able to use them as copywork, since she will need to make a copy of the recipes for her sister :o)

Blessings,
Photobucket

Wednesday, June 2, 2010

Wonderful New Blog


So I found this new blog site and am very excited about it. It's called "Raising Homemakers". Being the mom to three girls (so far) I can imagine I will learn a lot from this site! And this week they are giving away the Homestead Blessings 10 DVD pack! I've been drooling over this DVD set for a while now. I think it would be such a wonderful resource to have on hand. Head on over to their site and enter to win.

Raising Homemakers

Blessings,
Photobucket

Monday, April 19, 2010

Our Bedroom Re-decoration

So, like I said in my last decorating post, Hubby and I are working on redecorating our home and we started with our bedroom. Now, I didn't remember to take before pictures. However, I did think to take a picture of "The Wall" before we changed it :o) Here it is:


Now, this wall has been an annoyance ever since we moved in almost 6 years ago (yes, it really has taken us that long to do something about it, lol). First I should mention, our room is basically blue. The carpet is a light blue, the blinds are blue and the bathroom has blue tile. So why the people who lived here before us (Hubby's grandparents rented it out for 7 or 8 months before we moved in) thought Forest Green would be the perfect color for this wall, I will never know (and, no, the picture doesn't truely show the color well). They also did a horrible job of painting it. The wall originally had wallpaper on it that was put directly on the drywall. They simply pulled the wallpaper off and slapped up some paint. They didn't use any kind of primer, they didn't texture the wall and they only did one coat of paint. The result was, you could see every blemish in the wall, there were thin spots where you could see the wall through the paint and there were holes forming everywhere (notice the rather large hole in the paint in the middle of the wall!) Here is the picture again, so you can truely appreciate the change :o)


So, Hubby and I spent the weekend painting and this is what "The Wall" looks like now:

We started with a light blue (and yes, we primed first!) and then I "ragged" on a purple and a darker-basically-looks-brown-purple. We decided not to texture, since the paint technique we picked would give the illusion of texture (and it does :o)). The color combination looks soooo much better with the rest of the room! Here are a few more "after" pictures of the room. And, for those of you who have never seen our room before, the curtains and the shelves with the dolls are new. Oh, and it's clean :o)


So we are basically done with our room now. We still want to change out the light fixtures (I REALLY don't like the ones that are there!), but we haven't found ones that we like and that are in the budget. So that may have to wait a little bit. But in the mean time, we have a much nicer "retreat" for ourselves.

The next project on the list will be the kitchen. This time I WILL take "before" pictures, lol. As a matter of fact, I may just go take the pictures NOW, so that I don't forget when we get ready to work on it :o)

Blessings,

Photobucket
Posted by Picasa

Thursday, April 15, 2010

My Decorating Project

So hubby and I decided it was finally time to make our house "ours". (For those of you who don't know, our house was previously his grandparents house for 45 years.) So we will be slowly changing the "decor" in various rooms. We decided to start in our bedroom so that we had "our" space first. Of course I forgot to take "before" pictures :o) But I will post "after" pictures when we finish.

I had a candle holder on the wall in the "hall" of our room that I moved to our bathroom. I then decided that I needed something else to put on that wall that went with what we were trying to do in the rest of the room. Here is what I came up with. (Sorry for the really bad pictures :o))

I went to the dollar store and picked up three of these frames...............

And went to Micheals and found these three crosses...................

And found this scrapbook paper in my stash...............

And this is the final product!

And here are close-ups of each frame.

So over all it took me about an hour to complete and it cost less than $25! And I think it turned out pretty good ;o)

Blessings,
Photobucket
Posted by Picasa

Wednesday, November 4, 2009

Success!!!

We recently did a major clean and reorganize of the girls' bedroom. We needed to make room for another bed so that we could move Little P into their room. With the new baby coming in a few months, we will be needing the crib (and the space) in our room. And I wanted to make sure Little P had time to adjust to being in a big boy bed before she gets here. Of course I forgot to take before pictures (sigh) but I went through my computer and came up with a couple. They are a little old and they don't show the whole room, but they do give a somewhat decent representation of the condition their room was normally in.

BEFORE:


AFTER:

Here is what the room looks like now. As you can see, we needed to move the beds around to make room for the captains bed. Now this is the best part: Their room has stayed this clean FOR OVER A WEEK!!! It's been wonderful! No more stepping on sharp little things in order to get to their bed to give goodnight hugs.

This picture shows what we did with most of their toys. I organized everything into bins of similar items. Now almost all of their toys are in those big blue tubs! They have to ask to get one out, so it is easier for me to stay on top of making sure they clean up what they are done with before they get out something new. So far it has worked really well and they are starting to get used to the process now, so the complaints have eased also :o)

So the next will be to finish reorganizing their play area out in the main part of the house. This is where they have their play kitchen (and all it's accessories) and their dress-up clothes. We have the dress-up stuff mostly done, but still need to go through all the kitchen stuff. And then it will be time to move on to our bedroom and closet (I'm not looking forward to this, it's a mess, lol). I am, however, looking forward to having the house organized and relatively clean before new baby gets here. Hopefully, that will help me keep from stressing over the condition of the house while I'm supposed to be recuperating!

Blessings,

Glennda
Posted by Picasa

Wednesday, August 26, 2009

School Room and Organization

OK, so I don't really have a school room. Like a lot of homeschoolers, we have school in the living room and sometimes the dining room. But, thanks to my wonderful hubby, last weekend we did some major re-arranging and now have a designated school area in the living room. Here are couple pictures:


We just scored the bigger of the two desk at a garage sale this weekend! Although, now Little P thinks he needs one of his own, so I guess I'm on the hunt for another one (sigh)! The drawer thing next to the table holds our math manipulatives, unifex (sp?) cubes and pattern blocks. The tote on top holds all of Munchkins school supplies. Everything in this box is for school use only. This has eliminated the "hunt" for pencils, paper, workbooks, etc. at the beginning of school.

As you can see, wall space is also at a premium in our house. Plus, it's an old house and the walls are lath and plaster, which means attempting to hang anything usually results in large holes in the wall. So, since I didn't have space to hang our map (or the desire to put large holes in the wall, lol) I put it on the table. A year or so ago, I purchased a few yards of clear vinyl on sale at JoAnns (I think between the sales and coupon I got it for $6) which I then put over the map. It makes for great dinner conversation, especially when you have company :o) Here is a picture (sorry it's a little dark!):

In the opposite corner from the desks is my "homeschool cabinet". This is were I keep all of my supplies and teachers manuals and anything I don't want the kids to have constant access to. The top cupboard has my books and such. And the bottom cupboard holds my supplies (extra pencils, pens, glue, scissors, etc.) and bins with my preschool educational activities. Here are a couple pictures of that:


Some friends were discussing how to organize all the "extras" recently. This is how I do it. I've picked up several shoebox sized plastic bins over the years (The Dollar Store!) and have a bin for each item (crayons, colored pencils, markers, glue, etc.) They are all in a cupboard under the built in buffet in the dining room. I also have a similar setup in the cupboard on the other side with games and puzzles. Here is a picture:


This is another benefit of our rearranging. We moved my sewing stuff down to the office in the basement and then brought the recliner and table/lamp to where my sewing stuff was. Our house has some interesting "nooks and crannies" due to a remodel that the previous owners did. They turned one of the bedrooms into a hallway in order to add a master suite on to the house. So this is kinda in the hallway, but it's a large hallway, lol. I love it cause it gives me a place for my morning bible study. Here is a picture:


So there you have a little peak into my home :o) I hope you enjoyed it.

Blessings,

Glennda

Command Center


I've posted this before, but since it is time for school to be starting again, I thought I would revisit it :o). And, Organizing Junkie is doing a Command Center round-up this week that I want to participate in :o). For more ideas on command centers, visit her site.

Earlier in the year I was feeling like my house was in chaos and feeling overwhelmed at getting it under control. The idea of someone dropping by unannounced terrified me, lol. I thought about making another schedule (MOTH), but that just made me cringe, it's so easy to fall off and not get back on. I contemplated using a schedule that had blocks of time (morning block, afternoon block, etc.) but even that seemed to restrictive. I had made a home-keeping notebook, but I rarely used it (I decided I simply didn't want to take the time and energy to open it, lol ). So I started searching for new home-keeping "tools". One of the things I came up with is the idea of a Command Center. Basically, I took my notebook and put it on the wall. Now everything is right there, visible, and I have no excuse for not remembering.

Here are a couple of pictures:


Now I'll explain the different elements :o)

The white board - I used a wet-erase marker to create different sections on the board. I have a place for the date, what's for dinner, scripture I'm working on, appointments, priorities, to-do list, things to buy and notes.

The calendar - This is where I can keep track of what's going on. The pink sticky notes are my meal planning, I write the meal on the sticky and put it on the day I want. Using stickies makes it easy to switch days if necessary.

Cork Boards - These are there to put up things like reminders and invitations.

Little wood shelf - This holds my supplies; pens, pencils, eraser, sticky notes, etc.

Wire hanging file - I made "pockets" out of scrapbooking paper for this. Both to make it more functional (things can't slip out) and pretty. I have important fliers and such in the bottom pocket. And I put the papers I did use from my notebook into report covers and those are in the top pockets.

Basket on top of wine rack - This is a place to put papers and things that my hubby needs to take to his office in the basement (as you can see, he's a little behind :o))

Big blue tub - This is the "mommy basket". As I'm tidying up, things my children have chosen not to put away go into this tub. They then have until bedtime to remove and put away anything they find in there. After bed time, I remove the items and take them to the basement for a week. At the end of the week the items are placed back in the tub and they once again have till bedtime to put them away. If they still do not get put away, then I figure they really don't need/want them and they go away :o)

Overall, I tried to make the space functional and pretty. Thus the reason for the cute signs and the flower arrangement. I didn't want it to look like an eyesore, 'cause then I wouldn't use it. It is still a work in progress and I will probably tweak a few things as I determine what works and what doesn't, especially now that we are starting a new school year. Anyway, that's what i have so far :o)

Blessings,

Glennda
Posted by Picasa
 
Background Papers and Embellishments Created by Marie Stones