
Showing posts with label Crafting. Show all posts

Wednesday, August 17, 2011

A new schedule

A couple weeks ago, I saw THIS post with the idea of a visual schedule. I immediately loved it! I've tried a schedule several times, but every time I failed. I've mostly followed the MOTH system, but I always seemed to "fall off" the schedule and never figured out how to successfully get back on. However, I have noticed that Peanut does much better with a schedule. She needs to know we are doing this, then that, then food (she's all about the food, lol). So I've been trying to come up with a way to do a schedule that works for both of us. I'm hoping this idea will be a perfect fit. It's still a schedule, but easy to change on the fly if necessary.

Now, this post will also show that I am not a very good blogger, lol. I failed to take pictures of each step, so only have pictures of the final project. I'll do my best to walk you through how I did it, though =)

First, I created a document in word with all the items we would need on our schedule. I added a clip art that "matched" the item to make it easier on my non-readers. I then printed them on regular paper, 5 per page. I cut them out and glued them on a slightly larger piece of scrapbook paper.
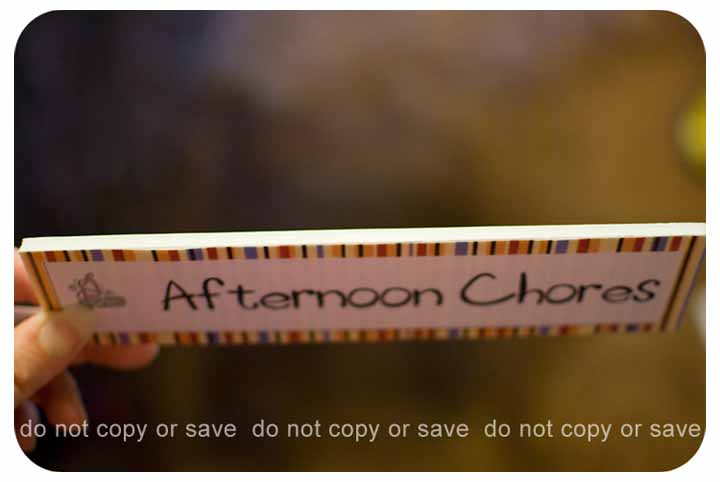
I then glued it on some foam board. Finally, I added a strip of magnetic tape on the back.

My Hubby then took the cabinet doors off our old BBQ and mounted them on the wall for me. Wala! Ultra cool visual schedule.

Close up of the top panel.

Close up of the bottom panel.

Wanna know what the best part is? I used materials I had on had, so it only cost me $3.99 for the magnetic tape! We haven't "officially" started using it yet (I only got it finished last night, lol), but I'm really excited to start. I really think it will help us stay in a routine.

Blessings,
Photobucket

Sunday, April 10, 2011

The Pillow Case Dress :o)

After making an outfit for Peanut to wear in my brothers wedding (that girl REFUSES to wear a dress {sigh}) I got bit by the creating bug :o) So I decided to sew a pillow case dress for Munchkin.

It was super easy. And I thought the heart applique made it a little more "fun".

Then I decided to make a pillow case dress for Bits.

* Disclaimer - Getting my 1yo monkey to stay still long enough for a picture is virtually impossible! So I apologize in advance for the poor quality pictures :o)

I did bring the sides in a little on hers. I was afraid it would look too much like she was wearing a bag if I didn't, lol. I also added a ruffled "pocket" to the front. I then threaded a ribbon through the pocket and it ties in the back.

Here is the back.

I was still feeling creative so I decided to make another dress for Bits.
I made the bodice out of a pillow case and then the skirt is the skirt off an old bedskirt!

I'm also contemplating making another, more elaborate dress for Munchkin. It's a little more involved though, so I'm a little nervous not having a pattern! It will be made from scraps and such I have laying around.........Which I probably wont use for anything else........So I probably should just go for it. There, I talked myself into it ;-) I'll keep you updated on how it goes!

Blessings,
Photobucket

Wednesday, August 18, 2010

Re-purposing

Some of you may remember about a year and a half ago I re-purposed some jeans into skirts (click HERE for a refresher). Around that time I bought a pair of overalls at a garage sale. I was thinking I could turn them into a cute jumper kinda like I had with the skirts. They sat in my sewing room for quite some time before I finally got around to working on them, but I did eventually turn them into a jumper. However, it just didn't turn out right. I ripped seams and cut fabric and tried several different things, but I just couldn't get it to hang right. So I finally just gave up and stuffed it away in my sewing room to work on at another time or to do something else with.

Fast forward to a few months ago. I started thinking about making a new apron for myself, but I couldn't find a pattern I liked. I was contemplating just making something up, when I remembered that failed overall jumper. It occurred to me that I could probably turn it into an apron or two. Well, this week, I finally sat down and did just that.

I managed to get, not one....

Not two...

But three aprons out of it! (*And I probably could get one more half apron, but it's from the piece that wasn't working for me with the jumper and I just don't want to mess with it right now!)

So anyway, here they are:

This is from the front of the overalls. I cut the buttons off the top and added a fabric panel to attach the straps to. I also added a flounce and a couple more pockets. I left the original side pockets intact. I was figuring this would be a great one for wearing while cleaning so that little things I pick-up can get put in a pocket. The pockets are also great for clothes pins =)


This one was the back of the overalls. Again I added a flounce and a top panel. I did the upper straps a little different and I'm not sure yet if it's going to work. I'm thinking they may slid down off my shoulders, so I may have to come up with something different. But we'll see =)


This one was super easy! I just added the waist panel and straps and two pockets. The pockets on this one are more for looks, they aren't incredibly functional. =)

So there you have it. It was a super fun and easy project and I now have three new aprons! The best part is, the overalls only cost $2 and all the fabric was leftover from other projects!

Blessings,
Photobucket

Posted by Picasa

Sunday, June 20, 2010

Father's Day

As today is Father's Day, I wanted to take a minute to honor my wonderful husband.

Thank you, Sweetie, for being such a wonderful and loving father (and husband!). I very much appreciate the fact that you go to work everyday to provide for us so that I can stay home and care for and teach our children. And I'm thankful that you have such a solid foundation in God and that you are faithfully leading our family down that path. I love you and feel so blessed to have you in my life.

Now, the kids and I wanted to get a very special gift for Father's day this year. The difficulty was, finances are VERY tight right now. So being the "crafty" person that I am, I immediately started trying to come up with some kind of craft we could do to make a present. What I finally came up with isn't really a "craft", but it turned out really great and Hubby loves it =)

So, here it is:


I took a bunch of pictures of the kids and then created this collage. I had it printed (minus the watermark!) as a 16x20 poster and then framed it so he can hang it in his office. I found the frame at Target for $5.99 and the print only cost $4.99 (with a $1 off coupon). So for $10.98 and a little bit of my time (OK, so it was A LOT of my time, but that's a whole 'nother story, lol) we came up with a very special Father's Day gift!

Blessings,
Photobucket

Thursday, April 15, 2010

My Decorating Project

So hubby and I decided it was finally time to make our house "ours". (For those of you who don't know, our house was previously his grandparents house for 45 years.) So we will be slowly changing the "decor" in various rooms. We decided to start in our bedroom so that we had "our" space first. Of course I forgot to take "before" pictures :o) But I will post "after" pictures when we finish.

I had a candle holder on the wall in the "hall" of our room that I moved to our bathroom. I then decided that I needed something else to put on that wall that went with what we were trying to do in the rest of the room. Here is what I came up with. (Sorry for the really bad pictures :o))

I went to the dollar store and picked up three of these frames...............

And went to Micheals and found these three crosses...................

And found this scrapbook paper in my stash...............

And this is the final product!

And here are close-ups of each frame.

So over all it took me about an hour to complete and it cost less than $25! And I think it turned out pretty good ;o)

Blessings,
Photobucket
Posted by Picasa

Friday, December 11, 2009

Diaper Bag

OK, so this is probably my favorite project so far. It was a lot of fun to put together, creating the pockets allowed for a lot of individual creativity. I really wanted a new diaper bag with this baby as I wanted something a little more girly and I've been a little frustrated with the pockets on the handmade bag I currently have. So I was really excited to create this the way I wanted. And I'm very pleased with the way it turned out. Hopefully I'll still like it when I actually start to use it! :o)

This is one side of the outside with one large pocket. You can also see the smaller pocket that spans the side seam.

Here is the other side of the outside. Both the poke-a-dot piece and the brown are pockets.

And here is the best I could do of the inside. It's not very easy to take a picture of the inside of a bag by yourself, lol. Basically one side has a big zippered pocket (the lime green) and then a smaller pocket on the front. The other side has two kinda tall skinny pockets with smaller pockets on the front. There is also a magnetic closure at the top of the bag.

I'm also working on a nursing cover in similar colors. It won't match perfectly 'cause I didn't want to use decorator fabric for it, but it will coordinate :o) I will post pictures of that also, when I finish it.

Blessings,

Glennda
Posted by Picasa

Mei Tai

My favorite style of baby carrier is the Mei Tai, sometimes called an Asian Baby Carrier (or ABC). However, as with most baby wearing options, they can be rather spendy to purchase. So I have decided to make mine. Here is my latest version.


This is the side that will be closest to baby. I picked a nice soft material.


This is the outside. The lime green square is a pocket that is accessed from the side, like a sweatshirt. The green straps at the top will hook through loops on the straps (I haven't put the loops on yet) to keep the sleeping hood up.

This picture shows what it looks like with the sleeping hood in the down position.

Once again the colors in the pictures didn't turn out quite right, but I think it gives a good idea. The inside is light pink. The straps are chocolate brown. The outside is a cream with light pink, dark pink and lime green poke-a-dots. And the pocket and the hood straps are lime green.

Blessings,

Glennda
Posted by Picasa

Baby's first outfit

We have a tradition of getting each baby a special outfit as their "first outfit". Really it's just the one we put on them to get their picture taken at the hospital :o) But, we put a lot of thought into picking just the right one and then, when they grow out of it, it goes in their baby box and no future children get to wear it. My hope is to give them each their first outfit either when they marry or when they have their first child. Anyway, I decided to make this baby's first outfit. So here are some pictures of it.

This is the front.

This is the back. I'm thinking I will sew matching buttons on the sides of the shoes.

BTW, the color is a pretty rose pink, the pictures kinda make it look orangish.

Blessings,

Glennda
Posted by Picasa

Wednesday, September 16, 2009

Attack of the Flowers!!!

So my house has parts and pieces of silk flowers all over. Plus flower tape, wire, wire cutters, ribbon and various other items needed to do floral arrangements. It looks like the the floral department at Michaels threw-up in various areas of my house. Here are a couple pictures to give you an idea of what I'm talking about.

Here's a picture of my couch and coffee table.

And the window seat in my bedroom.

Now, why, you may ask, do I have flowers and such all over my house? Because my sister is getting married this weekend. She doesn't want real flowers 'cause she's convinced she'll get stung by a bee (she's allergic to bees) if she does. So she decided on silk flowers and asked me if I would do the arrangements for her. And since being pregnant; taking care of three kids, a husband and a house; homeschooling; working part-time; and being Matron of Honor wasn't enough on my plate, I said yes (sigh). Anyway, I thought I would share the results of my hard work.

Here is the boutonniere for the Ring Bearer (who just happens to be my son!). When I finished this one I held it up and asked my husband if he though Little P would wear it. He said "Sure.............If you put it on his back!" (sigh)

Here is one of the other boutonnieres. There are nine total: one for the groom; 5 groomsmen; 2 dads; and one for the pastor.

Here are the corsages for the mothers.

This is the toss bouquet.

This is a bridesmaid bouquet, there are 5 total.

This is the brides bouquet.

This is the brides bouquet from the side and it shows the ribbon-wrap. The ribbon-wrap is the same on all of the bouquets.

And, if all of that wasn't enough, I was called yesterday and asked if I could do the flowers on the cake as well. It seems the bakery has a picture of a cake with flowers on it, but they don't know how to do the flowers! Go figure!

Here is one of the flowers that will be on the cake, there are nine. I have removed the stem and attached some wire. Hopefully when I get to the cake Saturday morning it will be easy to arrange them on it!


This is one of the black pearly things I used in the other arrangements. I'm going to take some of them with me the day of and see if I can put them on the cake as well. However, at this point, I have no clue what the cake looks like, so I'm not exactly sure how I will decorate it!

Just to clarify, the colors in some of the pictures look a little orange. There is NO ORANGE!!! The flowers are various shades of pink (well, the stephanotis is white) with some black accents. So in case you haven't figured it out yet, the wedding colors are fuchsia pink and black. I will post pictures of the wedding and the cake later next week :o)

Blessings,

Glennda

Wednesday, May 6, 2009

Look what I made!!

So, I finally discovered that knitting and crocheting are really great crafts :o). They are easy, don't take up much space, easy to set down and pick up with out massive amounts of work and best of all, they are relaxing!! So here are pics of a few projects I've completed recently.

These socks were a lot of fun! There are a few slight mistakes, but hey, I made socks!! How cool is that?!?

This is a dishcloth (I've actually made two of these, but the other one is currently in use). It was really quick and easy.

This is a bookmark (this one is crocheted, the last three were knitted). I think it's fun to make "dainty" things like this :o)

I also knitted a reusable cover for my Clorox Ready Mop, but I forgot to take a picture of it before I used it (oops!). Now it's rather dirty, so I don't want to post a picture of it :o).
Posted by Picasa
 
Background Papers and Embellishments Created by Marie Stones